Crispy Tofu Salad Rolls with Spiralized Carrots

I want to share with you one of my favvvvourite go-to meals… salad rolls! I’ve been craving them like crazy lately. They’re super delicious, healthy, and totally satisfying. Especially if you eat them with peanut sauce (because really, what wouldn’t you eat with peanut sauce?) They’re a little time consuming to prep, but trust me once you’ve got them all made you’ll ask yourself, “why the heck haven’t I made these before?!”

IMG_2016.jpg

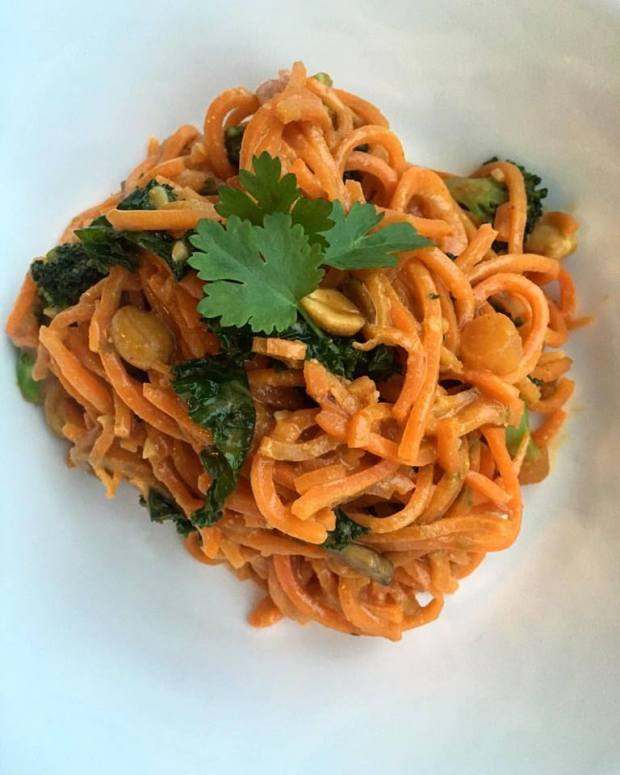
What makes these salad rolls a little different than other salad roll recipes that I’ve seen is the inclusion of, you guessed it, spiralized veggies!! Specifically spiralized carrots! One of my personal favorites. They’re sweet and they stay nice and crunchy, which is what you want for a salad roll.

IMG_2014.jpg

Crispy tofu, crunchy fresh veggies and a warm peanut sauce? What more could you want?

Enjoy!


IMG_2030.jpg


Prep Time: 10-15 minutes
Cook Time: 20-25 minutes
Total Time: 30-40 minutes

Salad rolls are one of my favorite Summer staples. Easily customizable and healthy!

Recipe Type: Spiralized
Cuisine: Healthy
Makes: 8 salad rolls


Ingredients

1 package of tofu, pressed and cut into rectangles
Sesame oil or coconut oil, to your preference
1 bell pepper, julienned
2 cups of shredded beets
16 mint leaves
1 bunch of cilantro
8 rice paper wrappers

For the ‘pickled’ carrot noodles

1 jumbo carrot, spiralized
3/4 cup of unseasoned rice wine vinegar
1 cup water
4 TBSP. of honey
1 lime, juiced
1/2 TSP. of salt


Instructions

  1. Preheat the oven to 400 degrees. Wrap the block of tofu in a clean tea towel or in paper towel and put something heavy on top of it. This will ‘press’ the tofu to take away the extra moisture.
  2. Once the oven is preheated, cut the tofu into small rectangles and place on a baking sheet lined with parchment paper and drizzle with sesame or coconut oil and bake for 20-25 minutes or until crispy. Set aside for later when done.
  3. Prepare the ‘quick pickled’ carrot noodles. Start by combining all the ingredients (minus the noodles) in a large mason jar and shake it around so the honey can disperse.
  4. Add the ‘noodles’ and leave in the fridge until you’re going to start assembling the rolls.
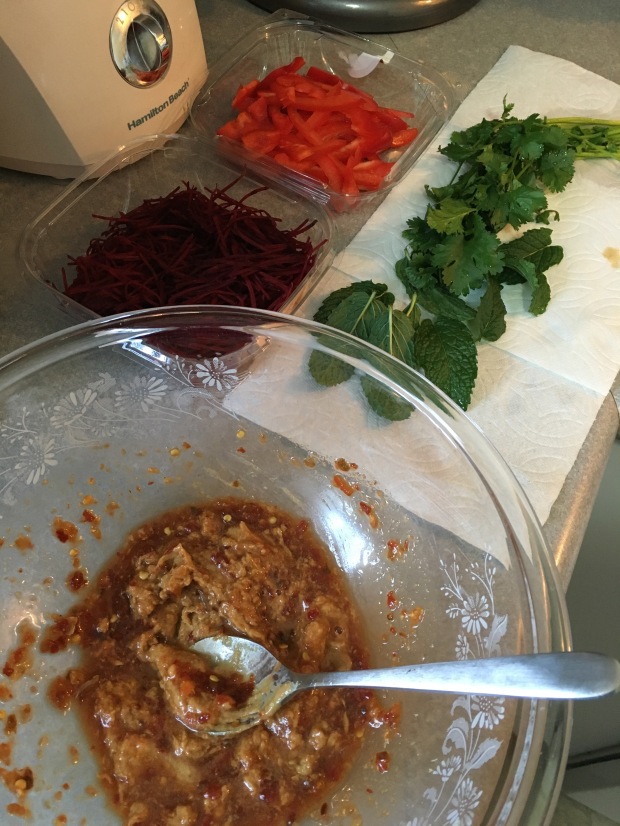
  5. Prep all your other veggies. Cut up the peppers, beets, herbs, etc. Cucumbers, purple cabbage, daikon, and jalapeño would be great choices as well.
  6. Prepare your assembly station. Have the veggies ready, as well as a bowl or plate with hot water to dip your rice paper rolls to soften them.
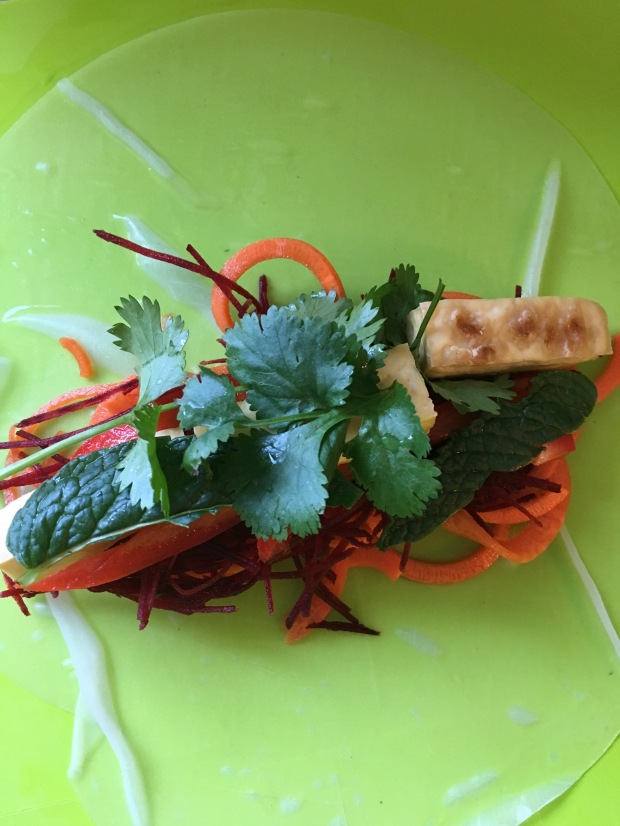
  7. To make a salad roll, dip the rice paper into warm water for 10-20 seconds and transfer to a damp surface, I used a plastic cutting board.
  8. Add the carrot noodles, about 3 pieces of tofu and a pinch of all the other veggies. Don’t forget the herbs! You’ll want to make sure you don’t over stuff the rolls or else you will not be very successful in actually tucking everything into itself.
  9. Now, the tough part… Fold the roll away from you, tuck in both sides, then continue to roll the roll away from you. (Did that sound as awkward and I think it sounded? Anyway…. I’m sure you can youtube how to do it.. yep, skip to 2:15)
  10. Lay the rolls on a plate seam side down and cover with damp paper towel to keep them from getting dry.
  11. Serve with your favorite peanut sauce and you are good to go!

Notes

  • The peanut sauce recipe I used was from here, Minimalist Baker – she’s amazing you should definitely check her out.

Baked Honey Garlic Sriracha Chicken

Alright, honey garlic chicken. One of my personal favs if I’m indulging on Chinese food. No indulging for us though right now. We’re on a health kick lately so I thought I would try and re-create some of our favorite flavors.

This was super easy to throw together.. and to cook for that matter. Not much thinking here folks. I put it all together, tossed it in the fridge to marinate and headed off the gym. By the time I was back (and starving) it was ready to toss in the pan.

And for those wondering, I’m also going to write up a post about the chicken’s friend down there in that picture, the ever-so-delicious-and-also-so-easy carrot noodle salad with feta and almonds.

Happy Sunday!


Prep Time: 5 minutes
Cook Time: 20 minutes
Total Time: 25 minutes

A healthier take on a guilty pleasure, honey garlic chicken.

Recipe Type: Entree, Healthy
Cuisine: Chinese-ish
Serves: 2


IMG_2115.jpg


Ingredients

2 chicken breasts
1 TBSP. olive oil
A generous splash of stock (optional)

Marinade:

3 garlic cloves, minced
1 TBSP. of ginger, minced
1 TBSP. of Sriracha
1 TBSP. of soy sauce
1 TBSP. of olive oil
1 heaping TBSP. of honey
1/2 TBSP of rice vinegar
Salt


Instructions

  1. Get a large ziplock bag and throw in all of the ingredients for the marinade.
  2. Add the chicken, and let it marinate in the fridge for at least 30 minutes. I let mine marinate for about 2 hours.
  3. Pre-heat the oven to 400 degrees.
  4. If you have a cast iron, get it ouuuut!
  5. Heat the pan on the stove on about medium heat.
  6. Add your chicken to the pan and sear it on both sides.
  7. Put the pan in the oven and let it bake for about 20 minutes. I poured the rest of the marinade in the pan with a little bit of vegetable (or chicken, if that’s what you have) stock to create a bit more sauce. You’ll need the splash of stock or else all the honey is going to create a burnt smelly mess in the cast iron for you to scrub later (no fun).
  8. Take it out after 20 minutes and it should be good to go!


Enjoy!

Rebar Modern Food

Location: Downtown YYJ
Address:  50 Bastion Square

Instagram feed: @rebarmodernfood


Meal Tasted: The Three Sister’s Enchiladas ($15.75), corn tortillas filled with pinto beans, roasted butternut squash and corn. Topped with a red chile sauce, white cheddar cheese and monterey jack cheese. Garnished with pumpkin seeds, cilantro and creme fraiche. Served along with red chile rice and creamy coleslaw.

Rebar! One of my favorite little hidden gems downtown. It’s a funky, fresh and fun space and not only is it super delicious… but it’s healthy! The decor is eclectic, colorful and has a unique vintage-touch. The menu consists of mostly vegetarian and vegan choices with a few fish options for the I-need-meat-eaters. They also have a large menu of fresh juices, smoothies and unique alcoholic drinks. Rebar strives to serve only local and seasonal ingredients which I am all about right now. So, what better place to meet up with two of my lovely girlfriends for dinner on a beautiful Spring Sunday.


IMG_1676.jpg


I ordered the Three Sisters Enchiladas and boy was I impressed!  The enchiladas were so flavorful, had lots of filling (and cheese!) and a good spice kick (which I love!). The coleslaw and the rice worked as perfect accompaniments to the enchiladas. The slaw was nice and creamy so it off-set the spice from the red chile rice and enchilada sauce. The rice was perfect to scoop up the last bits of the sauce too!

Some other dishes that I’ve tried at Rebar are the yam and potato wedges, the sesame kale salad, and the spicy peanut noodle bowl. All of them were super delicious as well, I just don’t have pictures to share with you… I’ll have to go back and order them again I guess… (yay!) Rebar also has a big dessert case full of delicious looking creations that I most definitely want to get my hands on! That’s right, I’m coming for you lemon tart.

Until next time, Rebar.

Carly

Thai Peanut Carrot Noodles

Another spiralized recipe! You guys better get used to these because I cannot get enough of my spiralizer. It allows me to have ‘pasta’ everyday! Without the guilt! I call that a win.

Anyone who knows me knows my love for Thai food. All the delicious fresh herbs, noodles and spices – where can you go wrong?! So, tonight I decided to try to re-create one of my favorite Thai-like dinners – peanut noodles! minus the noodles… so here we are with carrot noodles.

I went down to the Root Cellar this weekend and grabbed these GIANT carrots. People must have laughed at me if they saw my reaction to the size of these babies. All I could think was how perfect they were for spiralizing! So here we are. Coodles? Carroodles? Who knows. It’s delicious either way.

If you don’t own a spiralizer, GO GET ONE, kidding.. kind of.. but really, if you don’t have one you could try to julienne your carrots, very thin! Or you could possibly use some kind of vegetable peeler that could give you a noodle like shape, you’ll just have to adjust your carrot cooking time if they’re that thin.

Anywho! I hope you enjoy this recipe as much as I did, I know it’s going to be on rotation now in our house!


Prep Time: 15 minutes
Cook Time: 20 minutes
Total Time: 35 minutes

A super delicious and light take on a Thai comfort food – peanut noodles! Now featuring a vegetable friend, carrots.

Recipe Type: Entree, Spiralized
Cuisine: Thai, Healthy
Serves: 2-3


12938133_10156806012360297_4980912789139188467_n.jpg


Ingredients

For the sauce:

The solid ‘cream’ from a can of coconut milk, don’t shake the can before you open it!
1/3 cup of natural peanut butter
2-3 tablespoons of red curry paste
2 tablespoons soy sauce
1 TBSP of sambal oelek
Juice and zest of 1 lime
1 TBSP of ginger, finely grated
2 TBSP of garlic, finely minced

1 TBSP of sesame oil
2 jumbo carrots, spiralized
1 cup of mushrooms, sliced
1 cup of kale, chopped
1 cup of broccoli, chopped into bite sized florets
1/2 cup of peanuts, chopped
Cilantro to garnish


Instructions

  1. Add the sesame oil to a non-stick pan and set to medium heat. Add in the mushrooms and broccoli and sauté them until they’re almost tender. Add in the kale after and cook until it’s soft. Set these veggies aside until later.
  2. Put all the ingredients for the sauce in the same non-stick pan (I don’t like having 100 dishes to do once I’m done cooking, okay?
  3. Whisk until sauce is bubbling and fills your kitchen with delicious smells. Set the sauce aside.
  4. Now, put your spiralized carrot noodles in the same pan, ensure that you have a lid that you can set over this pan because we are going to slightly steam the noodles…
  5. Put the noodles in the pan and add about 1/2 cup of water and cover with the lid.
  6. Toss the noodles around every few minutes until they are the desired softer noodley texture that you like.
  7. Now, get out a large mixing bowl and toss the sauce, carrot noodles and veggies all together! Add in some peanuts and fresh cilantro and you are on your way to dinner!

Red Wine and Balsamic Braised Beef Roast

Slow cookin’ – am I right? You need lots of patience but it’s always well worth the wait. I made this dish on a whim, and am I ever glad that I did. I think I can quote James in saying it’s one of his favorite things I’ve ever made (right, James?)

This recipe gave the two of us an abundance of left overs but it was perfect for lunches, and a couple dinners, for the week. I had it on top of salad, in a sandwich and with roasted vegetables. I think leftovers would also be amazing for making beef tacos. Maybe I’ll try that next time… 🙂

I hope you enjoy this recipe as much as I did!

Carly


Prep Time: 5-10 minutes
Cook Time: 4 hours
Total Time: 4 hours and 10 minutes

The perfect Sunday meal, a delicious slow cooked roast. It’s an effortless meal, you just need to have some time set aside and lots of patience, since you’ll have to sit and smell it’s deliciousness for hours (yes, that’s a word).

Recipe Type: Entree
Cuisine: French
Serves: 6-8


IMG_0718.jpg


Ingredients

3 lb. beef chuck roast, or another cheap cut of beef
1-2 TBSP. of butter
1 TBSP. of olive oil
2-3 TBSP. of tomato paste
1 medium yellow onion, chopped small
1 750 ml. bottle of (cheap) red wine, try a full-bodied Merlot, Bordeaux, or Bordeaux-style blend
1/2 cup of balsamic vinegar
Sprigs of fresh thyme, rosemary
Salt, pepper and garlic powder to season the outside of the roast
Stock to top up the pot, if necessary


Instructions

  1. Preheat your over to 350 degrees.
  2. Heat up your largest pot, I used my french oven, on the stove with the butter and olive oil.
  3. Season all sides of the roast with salt, pepper and garlic powder and rub it in.
  4. Sear all the sides of the roast until it is nice and caramelized.
  5. Set roast aside on a plate.
  6. Add the tomato paste and the onion to the pot and stir around.
  7. Put the roast back into the pot.
  8. Next, pour in the bottle of red wine and 1/2 cup of balsamic vinegar. If there is lots of room left in your size of pot you could also add some stock if you need to top it up with liquid. You want to make sure the roast is about 2/3 submerged in liquid.
  9. Now, surrounded your lovely roast with springs of fresh thyme and rosemary and put the roast in the oven covered with a lid for 3.5-4 hours.
  10. After it is done shredded it up with 2 forks and serve it over mashed potatoes, or on on toasted bun.
  11. Use the delicious sauce that’s left to pour over the roast and potatoes, or to dip your sandwiches.

Notes

  • If you want to reduce the sauce to make a thicker gravy you can do so by adding it to a pan, separated from the fat, and bring it to a boil. Sprinkle in some flour and whisk until the desired thickness.

Italian Baked Eggs

Time to whip out my favorite kitchen object – the classic, the amazing, the cast iron pan! I honestly don’t know what I would do without my cast iron pan. This recipe simply showcases the handy-dandy-ness (yes, that’s a word?) of a cast iron by being able to go from the stove top to the oven and back out again.

I made this recipe for James and I for Sunday breakfast and it was perfect! Savory, filling, but not too heavy. I’m not really a sweets in the morning kind of girl so this was right up my ally. And any time I get to have runny egg is a good time, amirite? #yolkporn

Anywho, I hope you enjoy this lovely breakfast recipe! Let me know what you think.

Carly


Prep Time: 5-10 minutes
Cook Time: 10-15 minutes
Total Time: 15-25 minutes

Brunch, the best meal of the day. Well, on Saturdays and Sundays at least. This super easy recipe is great for a brunch or would even be great for supper with a nice side salad.

Recipe Type: Breakfast, Brunch
Cuisine: Italian
Serves: 2


Ingredients

1 TBSP of olive oil
1/4 of a yellow or white onion, diced
5 mushrooms, sliced
1/4-1/2 cup of red pepper, chopped
10 or so cherry tomatoes, cut in half
10 thin slices of spicy salami, such as sopressata, sliced thin
1.5 cups of marinara sauce of your choosing
4 eggs
1/2 cup of aged white cheddar cheese, shredded
Baguette


IMG_1403.jpg


Instructions

  1. Preheat your oven to 400 degrees.
  2. Start by heating the olive oil in your cast iron pan over medium heat. Add your onions, mushrooms and peppers and sauté for a few minutes until the onions soften up.
  3. Add in your halves of cherry tomatoes and sauté for a few more minutes.
  4. Add in the salami and mix in with your vegetables.
  5. Add in the marinara sauce and make sure the meat and vegetables are spread evenly.
  6. Make 4 little holes in the sauce and crack an egg into each hole.
  7. Sprinkle the top with cheese and put into the oven.
  8. Bake for about 10 minutes or until the egg whites are cooked.
  9. Take it out of the oven and serve quickly as the egg yolks will continue to bake in the hot pan.
  10. Dip the baguette in the yolks, scoop the sauce and enjoy!

Notes

  • You can make this dish vegetarian simply by omitting the salami. I would probably double the amount of mushrooms in it if you do so.
  • If you don’t want to use salami you could use any type of sausage in this recipe as well. Simply crumble it and sauté it until it’s brown before throwing the onion and mushrooms into the skillet.

Green Papaya Salad with Shrimp

Green papaya salad – sounds pretty exotic doesn’t it? Well, don’t let the papaya scare you. This salad is THE BOMB. When I made it I used it as a side dish to my Thai feast extravaganza (yes, that’s what I’m calling my Easter dinner this year) but you could easily have this as a entree salad with some peanut chicken on top…. mmmm, peanut chicken. I know what I’m going to be making soon! Anyway, back on track…

This salad is super easy to throw together with the exception of having to shred up the papaya. I happen to have this super handy dandy tool in my Mary Poppins style utensil drawer (aka. a never ending mess of random bits and bobs – you know you have one too) which made it super easy to make this salad. However, if you don’t have this gadget you can julienne (chop in little strips), chop into very small chunks, or shred the papaya with a grater.

I hope you enjoy this salad as much as my family and I did! Let me know what you think!


Prep Time: 20 minutes
Cook Time: 4-6 minutes
Total Time: 25-30 minutes

This is a perfect side dish to add to a Thai inspired dinner. It’s very light, crunchy, and extremely addicting! Don’t be intimidated by the papaya – It’s worth the (truly minimal) effort!

Recipe Type: Salad, Side, Dairy-Free
Cuisine: Thai, Healthy
Serves: 6-8 as a side dish


Ingredients

1/2 cup of olive oil
1 lime, zested and juiced
2 garlic cloves, minced
2 TBSP. of soy sauce
1 TBSP. of Sriracha
Salt and pepper to taste
1 large green (cooking) papaya, julienned – I used a kitchen slicer I have similar to this
4 green onions, chopped
1 bell pepper, julienned
1/2 bunch of cilantro, chopped
1 340g bag of bean sprouts
200g of cooked shrimp
1 cup of chopped unsalted peanuts


IMG_1399.jpg


Instructions

  1. Add the bean sprouts to a wok with a splash of water and cook over a med-high heat for 4-6 minutes or until you are able to strain the water out of the sprouts.
  2. In a small bowl, combine the oil, lime zest and juice, garlic, soy sauce and Sriracha to make the dressing. Season to taste with salt and pepper and give it a good whisk.
  3. Shred your papaya and chop all of your remaining ingredients.
  4. Don’t forget to rinse of your shrimp with cold water before adding them to the salad.
  5. In a large bowl, mix all the vegetables and shrimp for the salad. Pour the vinaigrette on top and give it a good stir so the dressing is mixed thoroughly.
  6. Refrigerate the salad for at least 30 minutes before serving. I let mine sit for about 1.5 hours and it was perfect.
  7. Top with chopped peanuts when you’re about to serve it!

Notes

  • Recipe adapted from Paleo Leap – you can find the recipe here.
  • If you aren’t a fan of red peppers carrots would be a great substitution for this recipe.
  • Traditional papaya salad usually has dried shrimp and tomatoes in it – you’re welcome to give that a go with this recipe as well.
  • Don’t like shrimp? No problem – have it without!

Crust Bakery

Location: Downtown YYJ
Address: 730 Fort Street

Instagram feed: @crustbakeryonfort

Crust is my favorite bakery downtown – heck, it’s my favorite bakery.. anywhere! They’re located just downtown on Fort street and always have a wide selection of artisan breads, pastries, tarts and house made sandwiches and wraps!


IMG_1289.jpg


I’ve tried a few of the items that they offer but my favorite has got to be the Cronut. Don’t know what a cronut is? Well it’s a delicious blend of a croissant and a doughnut and if you haven’t had one before you. are. missing. out. Now, I’m not going to sit here and tell you that a cronut is a healthy choice, but we are all allowed treats right?

It’s flaky like a croissant, fried and rolled around in sugar and cinnamon and then filled with pastry cream. Amazing. You’re set for lunch after you have one of these bad boys – but how else are you going to get through a day of shopping downtown? When I popped into Crust most recently James came along with me too! I of course, had the vanilla cronut and James had the passion fruit cronut with lemon curd. Heaven.


IMG_1291.jpg


Some of other pastries that I’ve tried that Crust offers are: one of their famous chocolate meringues, a lemon berry tart, as well as a lemon meringue pie tart. All of them were so delicious – can’t say anything negative about this place!

The only piece of advice that I have to give is to get there earlier in the day because they do tend to sell out of the cronuts by the afternoon – That’s how good they are!

Let me know what you get when you go try out Crust so I know what to try next,

Carly

Mexican Quinoa Stew

Mexican Quinoa stew – all I can say is YUM! This is healthy comfort food at it’s finest. You get to sit on the couch all bundled up with a big bowl of goodness that you don’t need to feel guilty about eating – how great is that?!

Everything in this recipe comes together so effortlessly so it’s perfect for those nights where you don’t want to think too hard about dinner. Another great thing about this recipe is that everything is pretty interchangeable – don’t have corn on hand? That’s okay! Got an extra can of chickpeas? Throw some of those in! I’m sure it would taste great! Have some bell pepper you need to use up? Throw that in too! How about a handful of kale, cause why not?! (I think that’s what I actually did when I took the picture below… I can’t honestly remember because I’ve made this so many times!)

Anyway, I’m rambling. Moral of the story here is, this recipe is awesome – make it your own and let me know how it goes. Enjoy!


Prep Time: 5-10 minutes
Cook Time: 25 minutes
Total Time: 30-35 minutes

This dish is my go to weeknight dinner when I have no idea what to throw together after work. I almost always have the ingredients in my cupboard and who doesn’t have yams on hand?! I hope you enjoy this quick and easy meal as much as I do!

Recipe Type: Gluten-Free, Dairy-Free, Vegan
Cuisine: Healthy, Mexican
Serves: 4-5


Screen Shot 2016-02-27 at 9.42.04 AM.png


Ingredients

4 TBSP of oil
2 garlic cloves minced
1/2 of a yellow onion, diced
1 jalapeño pepper, seeded and diced
1 796 ml can of crushed tomatoes
1 540 ml can of black beans
1 can of corn niblets (whatever size you want depend on how much you love corn)
3/4 cup of rinsed quinoa
1 cup of vegetable broth
1 TBSP of cumin
1 TSP of paprika
1 large yam, chopped into bite sized cubes
1 avocado
Lime juice
Salt and pepper
Cilantro to garnish


Instructions

  1. Preheat your oven to 400 degrees.
  2. Chop the yams into cubes and set aside for later . . . you’ll see what I’m talkin’ about.
  3. Heat 2 TBSP of oil in a deep skillet over medium high heat.
  4. Add in your garlic, onions and jalapeño pepper and stir until soft and onions are translucent.
  5. Add the crushed tomatoes, black beans and corn to the skillet.
  6. Next, add in the rinsed quinoa and the broth.
  7. Stir it all around making sure the quinoa is covered up and mixed in.
  8. Add in the spices and stir until mixed.
  9. Cover with a tight fitting lid and let the mixture gently simmer for about 25 minutes.
  10. While your stew is stewin’ . . . . throw those yam cubes in the oven! Put them on a sheet tray, drizzle with olive oil and season them with salt and pepper. Let them roast for about 15-20 minutes until they are tender
  11. 25 minutes later . . . mix the yam into the finished quinoa mixture, scoop some stew out into a bowl and top it with mashed avocado, a squeeze of lime juice and as much chopped cilantro as your heart desires!

Hope you enjoy this recipe and please, let me know what you think!

Carly

Thai Cauliflower Green Coconut Curry with Carrot Noodles

My first spiralizing recipe share! How exciting. Everyone who knows me would tell you that I am obsessed with my spiralizer. It is probably my favorite kitchen tool. You can make almost any vegetable (or fruit!) into noodles, as long as it is thicker then about an inch and a half around. I first learned about spiralizing after stumbling on the Instagram page of @Inspiralized – what. a. find! I would encourage anyone who is interested in spiralizing to check out her website and Instagram for all the great information that she has to offer.

Anyway, on to the recipe – I absolutely love thai flavours so I couldn’t resist trying Inspiralized’s recipe for Purple Cauliflower Thai Green Coconut Curry with Carrot Noodles. However, I didn’t have purple cauliflower on hand so I opted for regular-ol’ white cauliflower. Either way, it was super tasty and satisfying! The carrot noodles were nice and sweet and complemented the coconut milk and green curry super well.

I added a few more ingredients to my version, as I believe you can’t have a thai curry without fish sauce, some heat and a little bit of sugar, that being honey or brown sugar – or whatever you choose.

I hope you enjoy this recipe as much as I did – Let me know what you think!

Carly


Prep Time: 15 minutes
Cook Time: 30 minutes
Total Time: 45 minutes

This dish is super healthy, light, and makes you feel like you’re eating unhealthy take out noodles when really you’re gobbling down a bunch of healthy delicious veggies!

Recipe Type: Gluten-Free, Dairy-Free, Vegan
Cuisine: Thai, Healthy
Serves: 2-3


Screen Shot 2016-02-27 at 11.50.13 AM.png


Ingredients

1 head of cauliflower, chopped into bite sized florets
1-2 TBSP. of coconut oil
1/2 of a yellow onion, diced
3-4 garlic cloves, minced
1 TBSP. of ginger root, minced or grated (tip: if you freeze ginger it makes it really easy to grate into recipes and it lasts longer in the fridge!)
3 TBSP. of Thai green curry paste (I usually use the brand, ‘Thai Kitchen’)
1 can of full-fat coconut milk
Juice and zest of half a lime
1 TBSP. of fish sauce
1/2 – 1 TBSP. of Sambal Oelek, or Sriracha depending on your preference of spice
1 TBSP. of brown sugar or honey (if you’re not vegan)
1 jumbo carrot, peeled and spiralized
Chopped cilantro (or parsley if you don’t like cilantro) for garnish


Instructions

  1. Prep, chop and spiralize all your vegetables. I always find it easier when I’m making a curry, or really any dish that is going to come together quickly, if my vegetables are all ready to go then there is less of a chance that I’m going to over-cook something or forget a crucial ingredient.
  2. Next, fill a saucepan halfway full of water and bring it to a boil. Once it’s boiling, add in your cauliflower and cook for 2-3 minutes until tender, but not too soft.
  3. Drain your cauliflower into a strainer and pat it dry and set aside.
  4. In a large saucepan or a wok, heat the coconut oil over medium heat. Once the oil is hot, add in your onion, garlic and ginger and stir the mixture for about 2-3 minutes or until onion becomes soft.
  5. Add the curry paste to the mix and stir around until it is full incorporated with the onion mixture.
  6. Next, add the coconut milk to the wok and bring to simmer. Then, you can add the lime juice and zest, fish sauce, Sambal or Sriracha and brown sugar.
  7. Let the sauce simmer and bubble for about 5 minutes – and please, taste it! This is where you can add a little bit of this, or a little bit of that to make it just like you like it! Don’t forget salt and pepper if necessary!
  8. Now you can add your cauliflower and let it cook in your curry sauce for about 10 minutes.
  9. Then, add in the carrot noodles and cook for about another 5-10 minutes until the carrot noodles soften.
  10. Serve with cilantro (or parsley) in a nice deep bowl so you can get lots of that delicious sauce!

Notes

  • Recipe adapted from Inspiralized – my favorite blog, ever! You can find the original recipe here.